GlusterFS is a scalable network file system. Using common off-the-shelf hardware, you can create large, distributed storage solutions for media streaming, data analysis, and other data- and bandwidth-intensive tasks. GlusterFS is free and open source software. In this Article we are going to see Introduction Gluster File System Install Configure Gluster HA.
Why GlusterFS – Introduction to Gluster File System
- GlusterFS is a distributed file system defined to be used in user space that can scale out in building-block fashion to store multiple petabytes of data under a single mount point.
- It is a software based file system which accounts to its own flexibility feature.
- It uses already available disk file systems like ext3, ext4, xfs etc to store data and client will able to access the storage as a local file system.
- GlusterFS cluster aggregates storage blocks over Infiniband
- RDMA (Remote Direct Memory Access) and/or TCP/IP interconnect in a single global namespace. Introduction Gluster File System Install Configure Gluster HA
Advantages of GlusterFS
- Gluster File system uses replication to survive hardware failures and automatically performs self-healing to restore performance. Aggregates on top of existing file systems.
- GlusterFS has no single point of failure. Completely distributed. No centralised meta-data server like Lustre.
- Extensible scheduling interface with modules loaded based on user’s storage I/O access pattern.
- Supports Infiniband RDMA and TCP/IP. Introduction Gluster File System Install Configure Gluster HA
- Entirely implemented in user-space. Easy to port, debug and maintain. Scales on demand. Too easy to deploy and maintain
Targeted Audience
Anyone who is having basic knowledge in Linux/Unix and ability to understand the file system concepts.
How to install and Configure Gluster in HA
Before implementing the Gluster setup, let’s go through the storage concepts in Gluster.
- Brick – Brick is nothing but a directory which can be shared among the trusted storage pool.
- Trusted Storage Pool – Collection of shared files or directories Block Storage – Devices through which the data is being moved across systems in form of blocks
- Cluster – Collaboration of storage servers based on a defined protocol
- Distributed File System – A file system in which data is spread across multiple nodes where users can access the files without knowing the actual location of the server
- FUSE – Loadable kernel module which allows users to create a file system without involving any of the kernel code
- Glusterd – GlusterFS management daemon which is the backbone of the file system which will be running all the time
- Volume – A logical collection of bricks Introduction Gluster File System Install Configure Gluster HA
Ports required
- 24007 TCP for the Gluster Daemon
- 24008 TCP for Infiniband management (optional unless you are using IB (InfiniBand) )
- One TCP port for each brick in a volume. So, for example, if you have 4 bricks in a volume, port 24009 – 24012 would be used in GlusterFS 3.3 & below, 49152 – 49155 from GlusterFS 3.4 & later.
Note: by default Gluster/NFS does not provide services over UDP, it is TCP only. You would need to enable the nfs.mount-udp option if you want to add UDP support for the MOUNT protocol. That’s completely optional and is up to your requirement to use.
Installation and Configuration Gluster HA
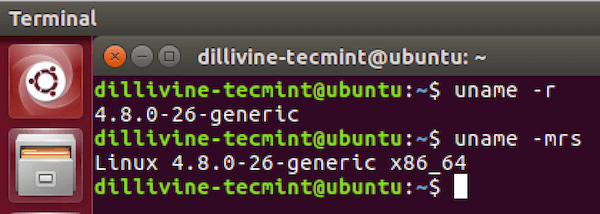
Now let us start installing and configuring the GlusterFS. Take two Centos 7 servers and name them as per your choice say Glusterfs1 and Glusterfs2.
[root@ip-172-31-31-246 ~]# cat /etc/os-release
NAME=”CentOS Linux”
VERSION=”7 (Core)” ID=”centos”
ID_LIKE=”rhel fedora”
VERSION_ID=”7″
PRETTY_NAME=”CentOS Linux 7 (Core)”
ANSI_COLOR=”0;31″
CPE_NAME=”cpe:/o:centos:centos:7″
HOME_URL=”https://www.centos.org/”
BUG_REPORT_URL=”https://bugs.centos.org/”

[root@ip-172-31-31-247 ~]# cat /etc/os-release
NAME=”CentOS Linux”
VERSION=”7 (Core)”
ID=”centos”
ID_LIKE=”rhel fedora”
VERSION_ID=”7″
PRETTY_NAME=”CentOS Linux 7 (Core)”
ANSI_COLOR=”0;31″
CPE_NAME=”cpe:/o:centos:centos:7″
HOME_URL=”https://www.centos.org/”
BUG_REPORT_URL=”https://bugs.centos.org/”
Note: Make Sure that SELinux and firewall are not blocking the above ports between the two servers.
In /etc/hosts create an entry of like below in both the servers. Make sure that you are able to reach both the servers in both servers.
Glusterfs1
[root@ip-172-31-31-246 ~]# cat /etc/hosts
 127.0.0.1 localhost localhost.localdomain localhost4 localhost4.localdomain4
 ::1 localhost localhost.localdomain localhost6 localhost6.localdomain6
 172.31.31.246 glusterfs1
 172.31.31.247 glusterfs2

[root@ip-172-31-31-246 ~]# ping -c 2 glusterfs1
 PING glusterfs1 (172.31.31.246) 56(84) bytes of data.
 64 bytes from glusterfs1 (172.31.31.246): icmp_seq=1 ttl=64 time=0.016 ms

[root@ip-172-31-31-246 ~]# ping -c 2 glusterfs2
 PING glusterfs2 (172.31.31.247) 56(84) bytes of data.
 64 bytes from glusterfs2 (172.31.31.247): icmp_seq=1 ttl=64 time=0.992 ms
Glusterfs2
[root@ip-172-31-31-247 ~]# cat /etc/hosts
 127.0.0.1 localhost localhost.localdomain localhost4 localhost4.localdomain4
::1 localhost localhost.localdomain localhost6 localhost6.localdomain6
 172.31.31.247 glusterfs2
 172.31.31.246 glusterfs1
 [root@ip-172-31-31-247 ~]# ping -c 2 glusterfs2
 PING glusterfs2 (172.31.31.247) 56(84) bytes of data.
 64 bytes from glusterfs2 (172.31.31.247): icmp_seq=1 ttl=64 time=0.016 ms
 64 bytes from glusterfs2 (172.31.31.247): icmp_seq=2 ttl=64 time=0.023 ms

[root@ip-172-31-31-247 ~]# ping -c 2 glusterfs1
 PING glusterfs1 (172.31.31.246) 56(84) bytes of data.
 64 bytes from glusterfs1 (172.31.31.246): icmp_seq=1 ttl=64 time=1.36 ms
 64 bytes from glusterfs1 (172.31.31.246): icmp_seq=2 ttl=64 time=0.619 ms
Enable the Gluster Repo in both the servers. Create a repo file and add the contents as shown below.
[root@ip-172-31-31-247 ~]# cat /etc/yum.repos.d/gluster.repo
 [glusterfs]
 name=GlusterFS – Distributed File System
 baseurl=http://buildlogs.centos.org/centos/7/storage/x86_64/gluster-3.7/
 enabled=1
 skip_if_unavailable=1
 gpgcheck=0
[root@ip-172-31-31-247 ~]# yum clean all
[root@ip-172-31-31-246 ~]# cat /etc/yum.repos.d/gluster.repo
 [glusterfs]
 name=GlusterFS – Distributed File System
 baseurl=http://buildlogs.centos.org/centos/7/storage/x86_64/gluster-3.7/
 enabled=1
 skip_if_unavailable=1
 gpgcheck=0

[root@ip-172-31-31-246 ~]# yum clean all
Install Glusterfs server and start the service. Introduction Gluster File System Install Configure Gluster HA
Install the gluster server on both the servers Introduction to Gluster File System Install Configure Gluster HA
[root@ip-172-31-31-246 ~]# yum install glusterfs-server -y

[root@ip-172-31-31-246 ~]# service glusterd start
 Redirecting to /bin/systemctl start glusterd.service

[root@ip-172-31-31-246 ~]# service glusterd status
 Redirecting to /bin/systemctl status glusterd.service
 ● glusterd.service – GlusterFS, a clustered file-system server
 Loaded: loaded (/usr/lib/systemd/system/glusterd.service;disabled; vendor preset: disabled)
 Active: active (running) since Fri 2016-09-30 07:10:44 UTC; 29min ago
 Process: 11956 ExecStart=/usr/sbin/glusterd -p /var/run/glusterd.pid –log-level $LOG_LEVEL $GLUSTERD_OPTIONS (code=exited, status=0/SUCCESS)
 Main PID: 11957 (glusterd)
 CGroup: /system.slice/glusterd.service
 └─11957 /usr/sbin/glusterd -p /var/run/glusterd.pid –loglevel INFO

 [root@ip-172-31-31-246 ~]# chkconfig glusterd on
 Note: Forwarding request to ‘systemctl enable glusterd.service’.
 Created symlink from /etc/systemd/system/multi-user.target.wants/glusterd.service to /usr/lib/systemd/system/glusterd.service.

[root@ip-172-31-31-247 ~]# yum install glusterfs-server -y

[root@ip-172-31-31-247 ~]# service glusterd start
 Redirecting to /bin/systemctl start glusterd.service

[root@ip-172-31-31-247 ~]# service glusterd status
 Redirecting to /bin/systemctl status glusterd.service
 ● glusterd.service – GlusterFS, a clustered file-system server
 Loaded: loaded (/usr/lib/systemd/system/glusterd.service; disabled; vendor preset: disabled)
 Active: active (running) since Fri 2016-09-30 07:10:44 UTC; 29min ago
 Process: 11956 ExecStart=/usr/sbin/glusterd -p /var/run/glusterd.pid –log-level $LOG_LEVEL $GLUSTERD_OPTIONS (code =exited, status=0/SUCCESS) Main PID: 11957 (glusterd)
 CGroup: /system.slice/glusterd.service
 └─11957 /usr/sbin/glusterd -p /var/run/glusterd.pid –loglevel INFO

[root@ip-172-31-31-247 ~]# chkconfig glusterd on
 Note: Forwarding request to ‘systemctl enable glusterd.service’.
 Created symlink from /etc/systemd/system/multi-user.target.wants/glusterd.service to /usr/lib/systemd/system/glusterd.service.
Now that installation has been completed. Let’s create the trusted storage pool.
From glusterfs1 Host
[root@ip-172-31-31-246 ~]# gluster peer probe glusterfs2
 peer probe: success.
From Glusterfs2 Host
[root@ip-172-31-31-247 ~]# gluster peer probe glusterfs1
 peer probe: success. Host glusterfs1 port 24007 already in peer list
Now verify whether both the servers are in the pool or not with the below command, from any of the two servers.
[root@ip-172-31-31-246 ~]# gluster pool list
 UUID Hostname State 2d7c96c0-31d3-48bc-8d61-a9c97d01f07d glusterfs2 Connected
 af8c77f4-f10a-4b28-915e-ae7bea2af4c6 localhost Connected
From the above, it is clear that both the servers are added to Trusted storage Pool.
To add extra servers to the pool list follow the same process as mentioned above.
Attach a new disk to each server and mount on any directory of your choice. We will use this mounted directory as a brick while creating the volumes.
Now we have the GlusterFS server is up and running, let’s create volumes and start accessing the data.
I have two new disks attached to both the servers, which will be used as a brick.
[root@ip-172-31-31-246 ~]# df -h | grep brick
 /dev/xvdf 976M 2.6M 907M 1% /mnt/brick1

[root@ip-172-31-31-247 ~]# df -h | grep brick
 /dev/xvdf 976M 2.6M 907M 1% /mnt/brick2
From any of the Gluster server run the following command to create a Gluster volume.
[root@ip-172-31-31-246 ~]# gluster volume create gvol glusterfs1:/mnt/brcik1 glusterfs2:/mnt/brick2 force
 volume create: gvol: success: please start the volume to access data
Gluster volume has been created successfully. Now let us start the Gluster volume.
[root@ip-172-31-31-246 ~]# gluster volume start gvol
 volume start: gvol: success
Gluster volume has been started successfully and now it is ready to serve the data. Before mounting this in client side, let us first check the gluster volume information.
[root@ip-172-31-31-246 ~]# gluster volume info gvol
 Volume Name: gvol
 Type: Distribute
 Volume ID: 74b01cf1-b1ac-4524-b2ad-ca465c02a888
 Status: Started
 Number of Bricks: 2
 Transport-type: tcp
 Bricks:
 Brick1: glusterfs1:/mnt/brcik1
 Brick2: glusterfs2:/mnt/brick2
 Options Reconfigured: performance.readdir-ahead: on
Mount the Gluster in clients (Windows and Linux)
Linux
Let us mount the gluster volume gvol in client machines to access the data. Add the Gluster servers IP addresses to /etc/hosts in the client machine.
[root@ip-172-31-18-13 ~]# cat /etc/hosts
 127.0.0.1 localhost localhost.localdomain localhost4 localhost4.localdomain4
 ::1 localhost localhost.localdomain localhost6 localhost6.localdomain6
 172.31.31.247 glusterfs2
 172.31.31.246 glusterfs1
Enable the Gluster Repo as we did on the servers. Create a repo file and add the contents as shown below.
[root@ip-172-31-18-13 ~]# cat /etc/yum.repos.d/gluster.repo
 [glusterfs]
 name=GlusterFS – Distributed File System
 baseurl=http://buildlogs.centos.org/centos/7/storage/x86_64/gluster-3.7/
 enabled=1
 skip_if_unavailable=1
 gpgcheck=0

[root@ip-172-31-18-13 ~]# yum clean all
Install the client packages with the following command
[root@ip-172-31-18-13 yum.repos.d]# yum install glusterfs glusterfs-fuse
Create a directory.
[root@ip-172-31-18-13 ~]# mkdir /mnt/glusterclient1
Mount it with the following command.
[root@ip-172-31-18-13 ~]# mount.glusterfs glusterfs1:/gvol /mnt/glusterclient1/
If all goes well, you will be able to see the gluster volume mounted successfully.
[root@ip-172-31-18-13 ~]# df -h
 Filesystem Size Used Avail Use% Mounted on
 /dev/xvda1 8.0G 1.1G 7.0G 14% /
 devtmpfs 478M 0 478M 0% /dev
 tmpfs 496M 0 496M 0% /dev/shm
 tmpfs 496M 13M 484M 3% /run
 tmpfs 496M 0 496M 0% /sys/fs/cgroup
 tmpfs 100M 0 100M 0% /run/user/1000
 /dev/xvdf 976M 2.7M 907M 1% /mnt/brick2
 glusterfs1:/gvol 9.0G 1.1G 7.9G 12% /mnt/glusterclient1
Create files from client and you will be able to see the files in the server
Mount GlusterFS in Windows
For windows machines we need to setup Samba configuration to export the mount point of the Gluster volume. Example, if a Gluster volume is mounted on /mnt/glusterclient1, you must edit smb.conf file to enable exporting this through CIFS.
Open smb.conf file in an editor and add the following lines for a simple configuration:
[gvol]
 comment = Gluster Stuff
 path = /mnt/gluster
 public = yes
 writable = yes
 printable = no
 Restart the samba service.
 service smb restart
Go to the windows machine and follow the steps below.
- Open “Computer” then “Network”
- Then search for the storage network \glusterserverip
- The CIFS exported volume will appear.
- Double click on it.
- Enter username and password specified during smb user creation and then connect and access the share.
Gluster file system supports different types of volumes based on the requirements. Some volumes are good for scaling storage size, some for improving performance and some for both which are explained below.